

Da Vinci Resolve 16 - Real World (Working) Review
- Andrew McGovern

- Jul 22, 2019
- 12 min read
Updated: Jul 6, 2020
I think that come every so often, markets are due for a shake up. I think people get so complacent and in routine that the sheer thought of breaking out of their regular pattern can be seen as somewhat terrifying and sometimes rage-inducing (Does anyone remember the trash-can Mac Pro?).
Trying something different isn't going to hinder your performance. A camera with better spec still has it shutter speed / aputure / ISO, and a supercar with a 5 litre turbo charged engine still has a throttle and brake pedal - Resolve bringing it's updated powerhouse editor to the world for creatives is no different.
Since working on The King's Man as a data manager / transcoder, I didn't really think i'd resort to using Resolve as an application that i'd use on set. The DIT used it along with Livegrade, and we exported whatever CDLs for the post work for whatever that day was.
This was my introduction to Resolve.
Now, really all I used it for on set was for taking whatever the camera shot and transcoded it to prores for the on-set editor; but it was enough of an interaction for me to contemplate not just using Resolve in place of an application i'm far more familiar with (Premier, of course..) but to replace the entire Adobe Creative Suite.
Just to give you an idea of what that was :
Premier CC
After Effects CC
Audition CC
Lightroom Classic
Photoshop CC
Illustrator CC (...kind of)
Encoder.
Now, admittedly, I can't replace Photoshop and Lightroom with Resolve, so I took out my £50 p/m subscription, and changed it to the £10 p/m for my photo work.
So I've had a couple of big project come up with Resolve, and whilst it probably wasn't the best of ideas to jump in with Resolves v.16.4 beta for actual work, I figured it everything went cock-eyed then at least I could just roll back to Premier.
So, without further ado, here's a real-world, hands on project using the latest, upto date version of Da Vinci Resolve.
Introduction
You wouldn't believe how much space I had to clear on my desktop so I could get this screenshot.....
The idea of changing to Resolve for my post workflow has been floating around for a while now. I think the ability to have (effectively) Premier / Audition / After Effects and Encoder all in one application is none short of incredible, and incredibly convenient. I didn't like the idea of switching apps between the whole CC catalogue, so convenience has played a big part in it.
Resolve does this in a different way, which i'll get onto later, but here's how it works:
Media ¦ Cut ¦ Edit ¦ Fusion ¦ Colour ¦ Fairlight ¦ Delivery
(Assembly, 2 edit panels, 'After Effects'.....Lumetri?....Audition and Exporting)
That, and cost.
£300 is the cost of the Studio version of Resolve. Unless you purchase a Blackmagic camera, then it's free.
There's also a version of Resolve that's free. Free. FREE.
As far as i'm aware, the advantages of the Studio version are some pretty amazing plug-ins and the ability to master in resolutions above UHD ( 3840*2160 ) and anamorphic modes. There's probably more in there, but to make it clear, the free version includes all the aforementioned bits of software, and there's no barriers to actually editing and colouring your content.

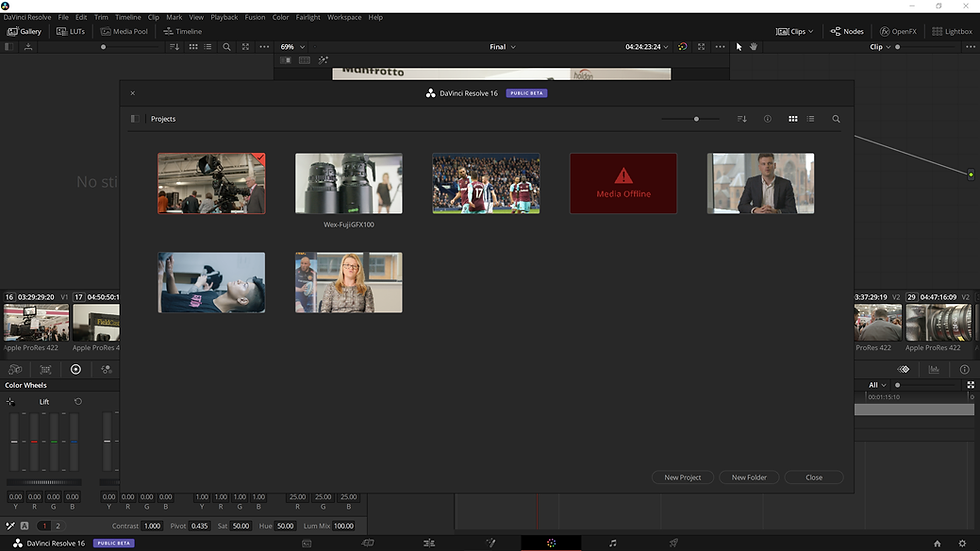
First up is your project manager. I actually prefer this to loading an individual Premier file. Click the app to start up and you have all your projects in a specified folder load up.
I thought i'd be courteous and remove the file names from the still, but much like the Wex video, you can see project name below the thumbnail.
These actually scrub through too, so if you have a master timeline selected, it'll play through that timeline right in the thumbnail; it opens it up to a lot of theoretical time-saving possibilities, but none that I've experienced (as these are all individual projects), so i'll continue.
New project and continue, it's all fairly straight forward, choose what your settings are yadda yadda yadda and boom, you'll be met with an empty media pool.

This is one of the bits that I think Resolve does really well, and I know that Premier does the same thing, but I've not felt as connected to my media as Resolve seems to be.
Top left, you've got your drive media. Either your main computers internal drive (drive-s), any external stuff - For an example, I have an 8tb G-tech RAID.
From here you can search wherever for your media, and bring it into your media pool, which is where you can see a whole bunch of 'Ninja' files below.
Bottom left you can see all the bins I've sorted my content into. It's just a nice easy way to have everything laid ouy for you.
I will hasten to add, that I've selected a list view on this occasion, however you can still select a thumbnail view. It all works the same, when you scrub through the thumbnail, it'll show you whats happening in the clip.
Next is the Cut page:

I have literally never used this page. I know nothing about it. Sorry.
If you're thinking that the witty line in italics will be met back with redacted statement, and you're expecting a full expanded hands on impression of the cut tab. You'd be wrong.
I think it's for the generation of people who have edited on imovie? Or something like the Adobe Rush thing that's just come out... But that's me pulling that out of thin air.
So, very quickly, we are met with the Edit page:

The pages in Resolve aren't quite as adaptable as Premier. I like that each window in premier is fully adjustable, with tabs that you can create separate menus for. Resolve has more 'click to show this' style of menu. Which isn't a bad thing, just know it isn't quite as adaptable as what you're used to....Unless you use the presets.... in which case you probably won't feel discouraged from the menu designs.
You've got colour code-able timelines, Audio & Video, a Source and Program monitor (regrettably not in the screenshot below...) - In the top right, we have a Final Cut inspired inspector which keeps your adjustments in, things like scale and position - along with stabilisation, a menu for metadata, and a button for a basic audio mixer.

The shortcuts in this app, are different. If you don't mind spending £1000 on a keyboard, you can get one from Blackmagic (Honestly, that's not a joke) - or you can map your own keys. I'm used to using B for 'blade' (vs. c for...'cut') and i'm now pretty used to 'A' for the select tool. Really I've not needed any more than that.
What I also like, is that in Resolve you can link the project to a sound library. Annoyingly, I have one folder on my RAID that contains about 50GB of audio data. Which doesn't load as quick as you might expect it to.
So if you need naturalforestambience1.wav you can link it and search for it in that window. Be warned though - unfortunately you need to know the file of what you're looking for. I'm sure a bit of organisation before you start and that'll be fine - just bare in mind 'waterripplesound3.mp3' might not be the first thing you think of. Especially when there's a large sound library involved.

In terms of the cutting process, I found Resolve to be much more fluid. Like surprisingly fluid. None of this bull**** stuff the premier does where it looks like it's mechanically moving things around in blocks like we're in an 8bit era. Resolve feels a lot more... iMovie. Like in terms of fluidity, not use. Adjusting clip durations, importing clips into the timeline and adding cut points we're done in a snap.
Again, disclaimer : I was using Prores 422 footage from an EVA-1 recorded into a Ninja-V.
It also might be worth mentioning my editing system:
Dell XPS 15, 9550.
6th Gen i7, 32GB Ram, Nvidia 960m.
Another...disclaimer: You won't believe it. I sure didn't. But I was editing off of a USB3 RAID. I thought i'd moved everything to an SSD on my desktop, but seriously - everything in this project was going buttery smooth over on an external drive.
Top Tip : If you're editing is going slow, convert to prores, edit on an SSD - this will be 100% more cost effective than a new rig. Seriously, instead of spending £2000 on a PC or £4000 on an equivalent mac, spend £650 odd on a Ninja + a couple of SSD's. You'll bag yourself a sweet monitor, 4k 60p prores recordings and something that editing software likes. There's a lot more science to this, which I might cover in another blog. But Don't think a powerful PC will end your editing woes.
Boy oh boy....do you think I should have mentioned this at the beginning of the blog post?
...anyway....
Editing is editing. You can be as creative as you like, and a direct switch from something like Premier isn't as disorientating as you might think. You may need to relearn a couple of shortcuts and a couple of video effects under different names, but a google / youtube search can sort you out.
COLOURING:

Look, i'm still willing to admit i'm still inexperienced with the Resolve workflow.
Grading, is Resolve. It's been developed from a powerful grading software into what it is now. Its incredibly versatile. However, it's also vastly different that using layers, like in Photoshop or After Effects for example.
Resolve uses 'nodes'. In the above image, if you take a look in the top right ox with the thumbnail in, you can see a clip. The box representing a clip is a node. You can add a whole heap of nodes, and they all do different things.
For example:
Node 1 : LOG footage Corrected
Node 2 : Corrected footage with additional LUT
Node 3 : Track subject and apply grade in window
Each of these have their own settings and adjustments. Again, i'm not too developed in a node based work flow, because there's primary nodes, secondary nodes and different ways to correct and adjust things.
Additional note: I recorded all of my content in the 'scene2' profile in camera - NOT in log. This saves me applying a standard .709 LUT that will effectively do the same thing. depending on your production, this may be a better option - because (and i'll mention this later) - Resolve can be super resource hungry. Taking all the LUTS off of your projects will just give you a bit more breathing room for your machine.
Editors rant: Stop shooting 8-BIT video in S-LOG 2, it's not good and it's not clever.
There's a lot to be said in this space. However, i'll keep it brief for the purpose of this blog. The colour panel is super powerful, if you're familiar with it, but you're importing and exporting XML's - I think if you can get your head around Resolve, it just makes sense to switch. Everything is a lot more streamlined.

The scopes at the bottom will play live with your footage, and as you can see in the middle bottom (...schwing!) you can create masks, track them and apply grades to specific parts of your image.
The panels at the bottom left for lift, gamma and gain are effectivly your shadows, mids and highlights. The offset is a general 'overall' adjustment. All very powerful and adaptable - there's other menus where you can actaully adjust the RBG values of each dark, mids and highs. That's 9 colour adjustments for basic corrections.
As I said, i'm not the most experienced with it, so I won't go into technical details, but it's very worth your time to sit down and learn, as I am doing now.
AUDIO:
Audio is another powerful tool. Much like the colour tab, I know little how to use it. IT seems to use a lot more technical language than Premier. For example, the around / audio ducking in premier is fairly simple. Actually, it's 'god-damn-it-i-wish-i-could-have-that-back' simple. Same with Auditions 'remix' feature. But I think it expands your knowledge technically. Its like knowing how to grade log footage and applying a LUT. One is way more simpler than the other, but the more technical version comes with its merits when you learn what it's actually doing.

For example, I've got Audio tracks 3 & 4 with speech, track 5 with BG music. I can set tracks 3 & 4 to 'speak' and 5 to 'listen'. Track 5 will listen for audio in the other tracks and apply certain pre-set characteristics defined by the user. In this case, when it 'hears' audio, it'll dip the audio - you can select how sensetive it is, what the fade duration is and how long to hold after the audio finishes - making it pretty adaptable.
Otherwise, I hadn't really experimented in the audio tab. I just didn't need to. It wasn't the project that screams sound design - anything more and it would have been pretty overkill.
Whack on a compressor, adjust the levels accordingly, job done.
EXPORTING:
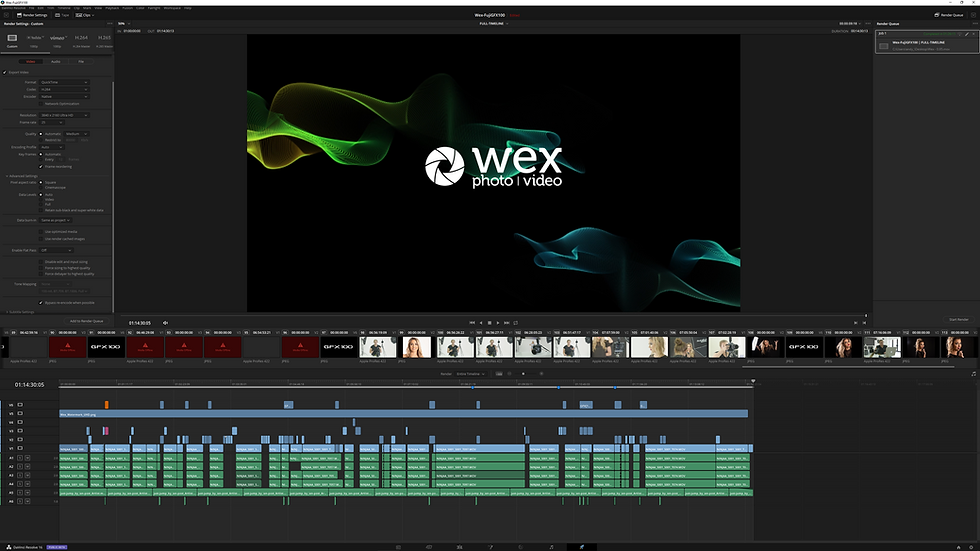
Again, this is a project that's intended to go on Facebook / Youtube / Social Media. As a result, anything that I do in the export is going to be heavily compressed and turned to utter dross however I export it. There's a good selection of settings for the export - I just chose a H.264 master and was done with it.
It does work like Adobe's After Effects / Encoder though. You can queue jobs up for different purposes and send them to different locations - which I really like.
Resolve does a good job of helping you choose the right thing. There's Youtube & Vimeo presets, alog with a master for H.264 and H.265.
Additional : There's also a bunch of settings to export to Final Cut, or Avid AAF, or pro-tools - should you want to adapt your workflow. I won't be, but it's nice for the other editors who do.
Additional 2.0 : There's an audio only section too. So in theory, Resolve + fairlight could also handle your Podcast workflow, which is very nice.
The Ugly :
Resolve isn't without it's hinderences though - and i'm not sure how much of it is Beta related - or application related, but here are a few things that I experienced in my workflow:
Whatever this is:

So, I had a 4k timeline, and I was trying to add stills from the Fujifilm GFX 100. Those are 100mp in size. I thought Resolve might have done a good job at handling that - premier certainly does - but it's caused some real problems for me.
So I changed everything down to 6k (6144*3240) in photoshop - I thought that this would be good enough - but the editor just wouldn't have it. Over the selection in the timeline, it wouldn't display the .jpgs and if it did, sometimes it would display the completely wrong one? - Nevertheless I had to THEN convert everything to a 4k UHD resolution, which worked out much better. The idea was to show off the 100mp in it's glory, but it just wouldn't work. Mind you, you still get the ridiculous detail in the video. Plus, with the compression, it would have been degraded anyway. Which is a shame, because everything looks so good on my main TV.
This, however might have been due to :
"ERROR : OUT OF VIDEO MEMORY, TRY REDUCING TIMELINE RESOLUTION OF CORRECTORS."
I've never been annoyed at Premier...
"ERROR, AN UNEXPECTED ERROR HAS OCCURRED".
Okay.... that's a lie.
What I mean, is that the video memory error, is an error I've seen more commonly in the support forums, and that's not Resolves fault (well, I mean it kind of is because that's the way it works) - but more so the end user's machine.
You see, Resolve uses the GPU as much as the CPU for everything. So when your GPU isn't upto scratch, the above message will appear literally every 30 seconds. (maybe not that often, but enough for you to want to punch your monitor in the face). and it's annoying.
It's annoying because I understand. I know, and I understand. A 2gb 960m is terrible. It's not built for this. I want to tell Resolve it's ok and to power through, but there's no option to do so.
The thing is I've seen people with 8GB nvidia desktop GPU's getting similar issues. So really, maybe 8GB ram is a bare minimum? An 8GB card is a fairly chunky card, and cards like that are only just available in the top top mobile workstations - so if you're on a laptop, you're in trouble (unless you have a external Thunderbolt GPU).
Another error I've faced is through using fusion effects, or fairly simple effects in the edit tab. Again, I can't quite pinpoint what the problem is for this - whether it's down to my system (likely) or because it's the beta software (also, very likely). Working on other projects may help me figure out what the issue is, but for me - I have no idea. I'd imagine a bit of both,
BONUS ROUND : CLONING
Cloning. A fairly simple, yet very cruicial part of the production / post production process.
I'll go over it quickly, because quite frankly if you've managed to read the post for this long, credit to you.
Copy and Paste is bad.
Bad because it's not 100%. and if you're copying files, corruption is a real threat to the file and the drive. Sometimes you can't locate what the problem is, and if you can it may already be too late.
Usually, I'm using Hedge or Yoyotta. Silverstcks is also a very good program to use - depending on your editor they may want you to generate reports (something Yoyotta does beautifully from experience).
But what I hadn't realised, is that Resolve does come with a 'Clone' option.
Kevin Beckman on Youtube puts it very simply :
And does a 100% better job than I could explaining to you in a post. Basically, it goes like this :
Input Media -> Clone -> Output Folder -> Verify.
Resolves is quite basic, but it does generate a user defineable checksum (file size, CRC32, MD5 SHA 256/512 ) which post people tend to like. It's also way safer to perform a copy like this, vs. a standard copy and paste.
CONCLUSION
I've not really kept upto speed with the subject headings, apologies.
But congratulations on making it to the end of the blog. You now have one persons total recollection of working on a real world project in Resolve (albeit, in beta software)
It's good, it's somewhat finicky for reasons that could or could not be my fault (likely my fault) - but I think the thing to take from this, is that I've not missed my other NLE's.
If you're considering it, It's free. Do some personal projects and if you want to make the jump, give it a go. I'm fairly confident in my ability to edit on Resolve before making the jump - so i'm happily safe. I'm also happily editing a second project and having the same ease as this.
Thanks for reading, If you have any questions or just want to talk about anything filmmaking - message me on Instagram at : Andy_Elvis11.
And as always, Happy Shoo....Editing!


Comments